CGDI Prog MB is able to add Mercedes Benz car keys as well as program new keys when all keys are lost. This post is showing how to use CGDI Pro MB to add Mercedes Benz car key.

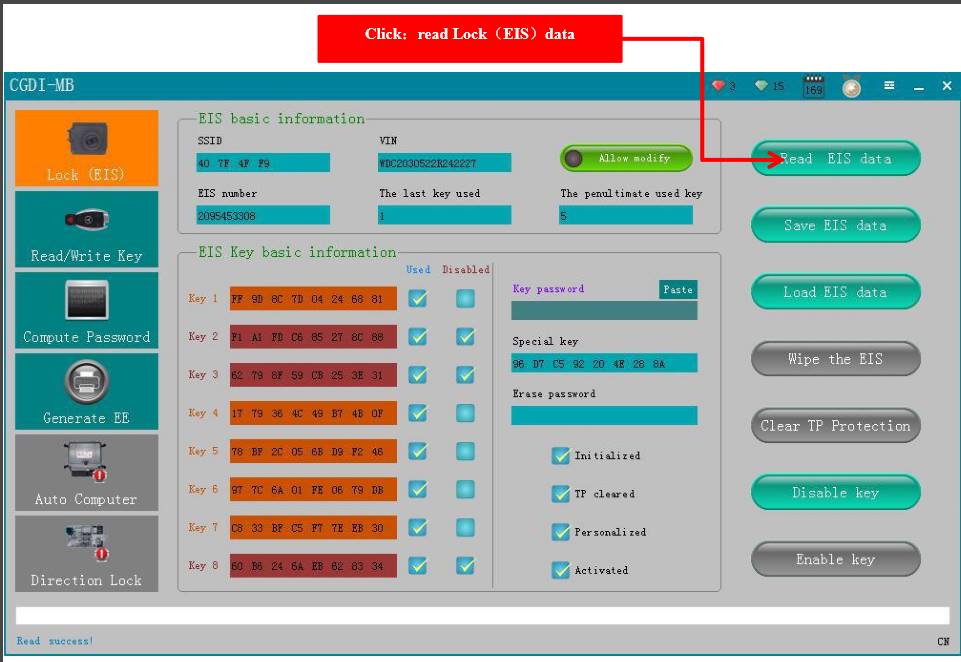
Step 1: Click on “Lock (EIS)

Step 2: Click on “Read EIS data”
Step 3: Click on “Computer Password”, then click on “Copy key with key”

Step 4: Click on “Other Keys” (One generation of key 705E6 key), then click on “OK”.

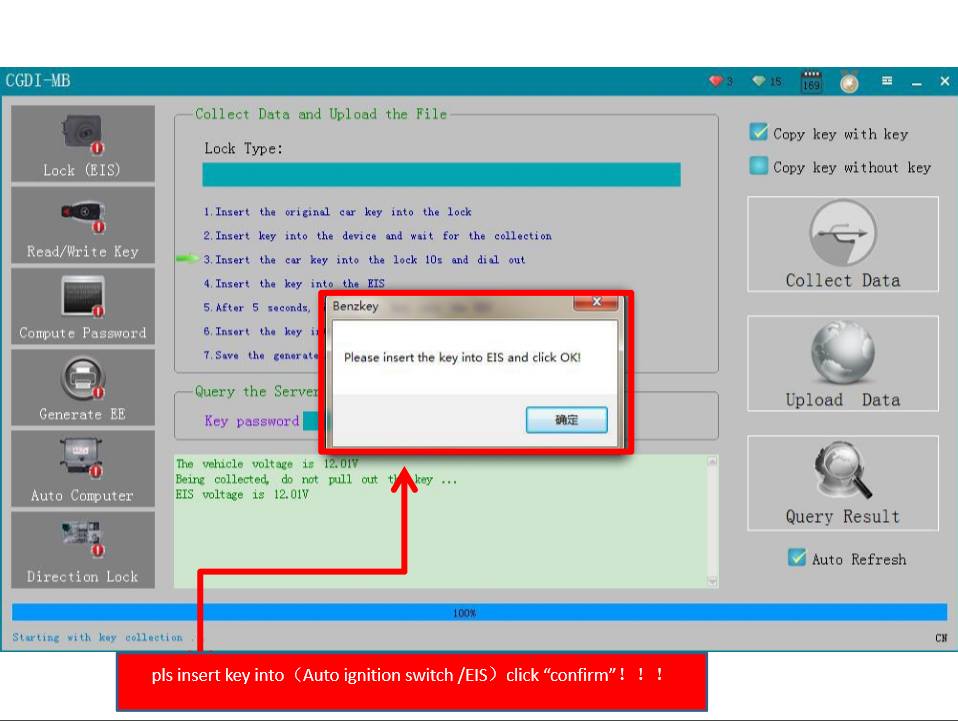
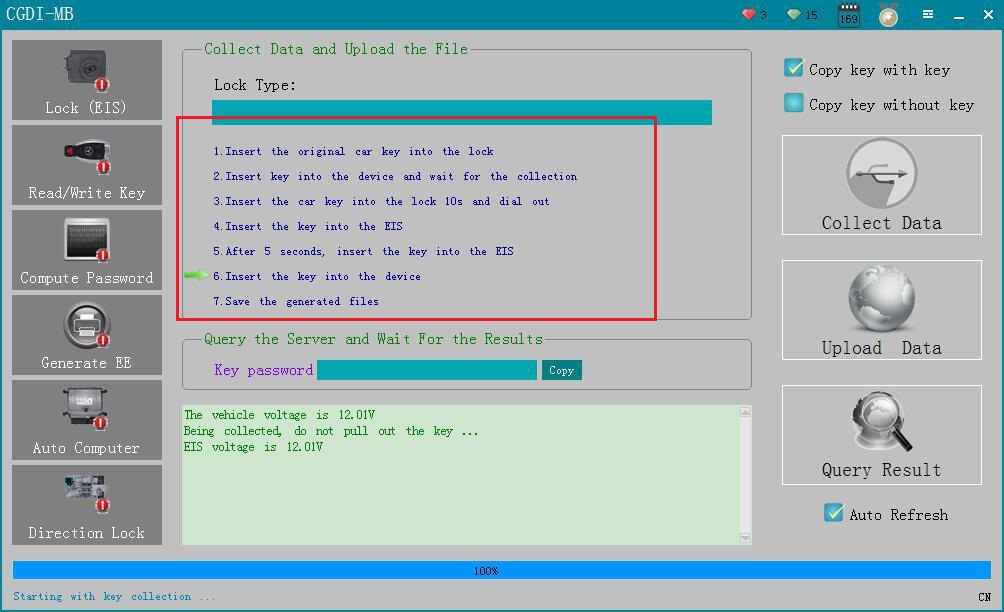
Step 5: Please insert the key into EIS and click OK.

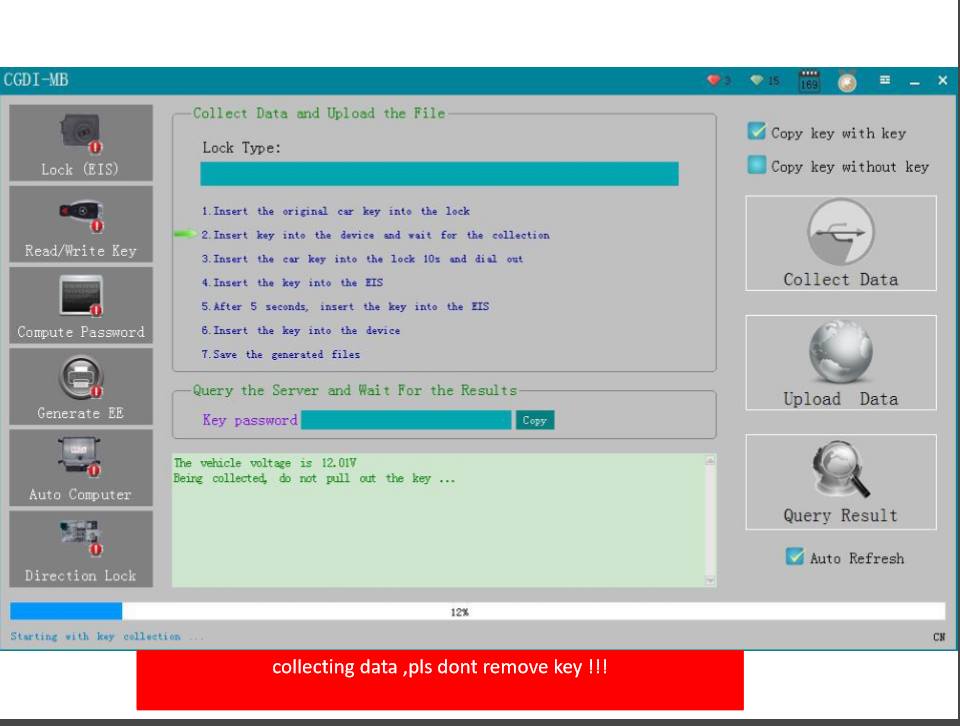
Step 6: Please insert the key into the device and click on OK!

Step 7: Collecting the data, do not remove the key.
Step 8: Please insert the key into EIS and click OK.
Step 9: Please wait for 7 seconds.

Step 10: Please pull out the key from the EIS, and then click OK!

Step 11: Please insert the key into the EIS again and click OK!
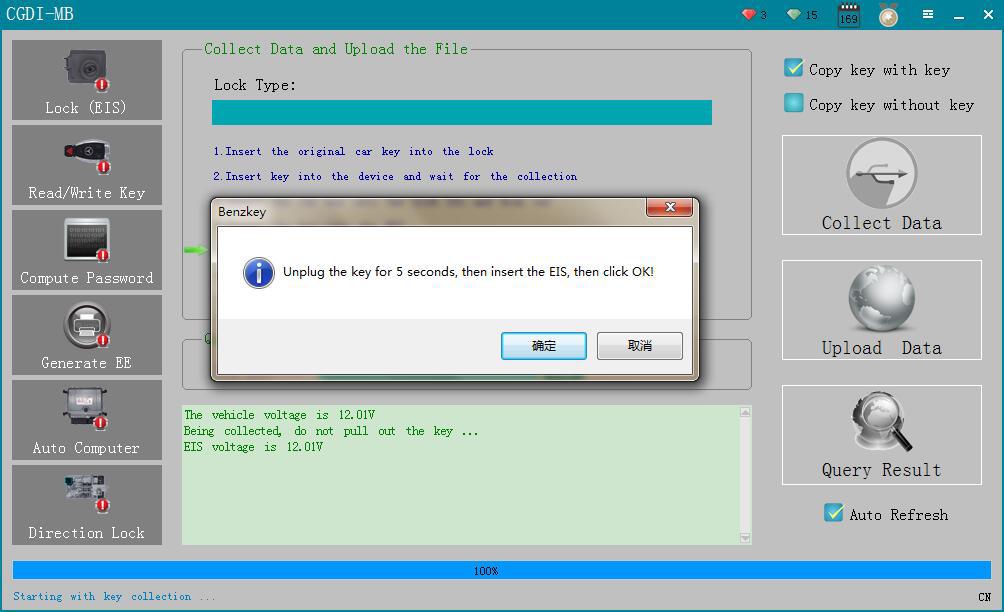
Step 12: Unplug the key for 5 seconds, then insert the EIS, then click OK!
Step 13: Save the generated files.
Step 14: Please insert the key into the device again and click OK

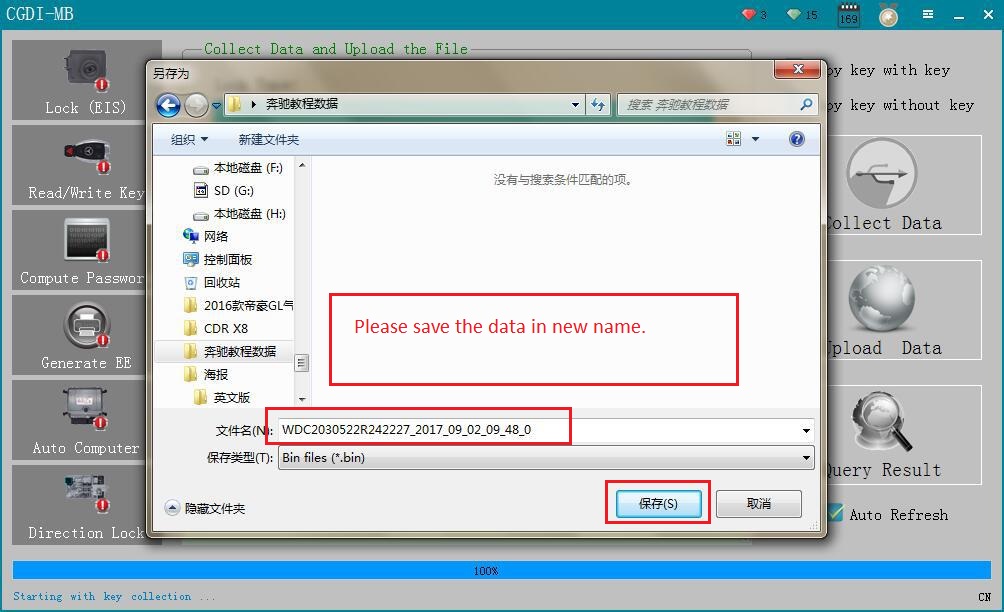
Step 15: Please save the data in new name.
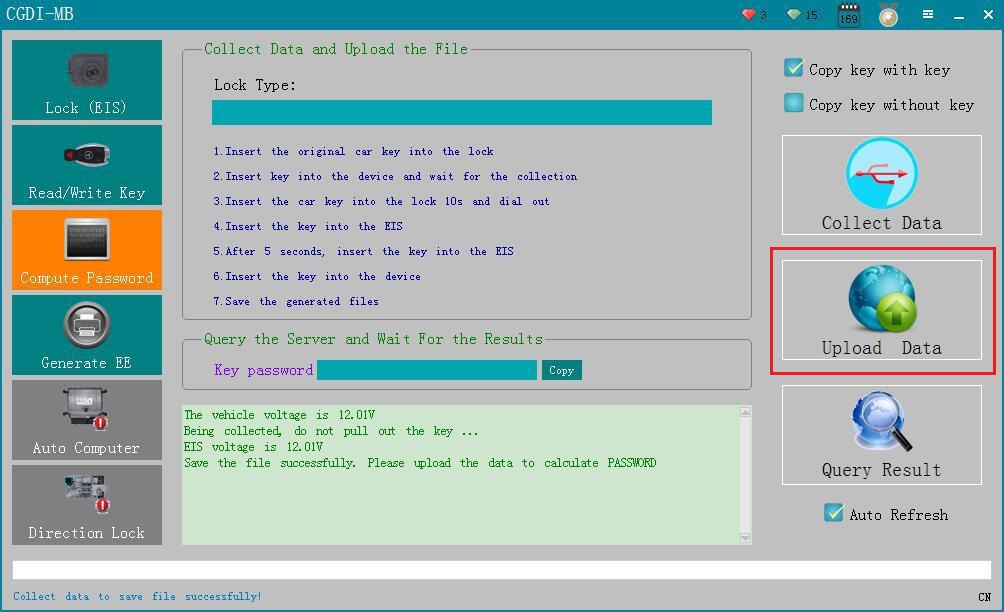
Step 16: Click on “Upload Data”
Step 17: Click on “Open”

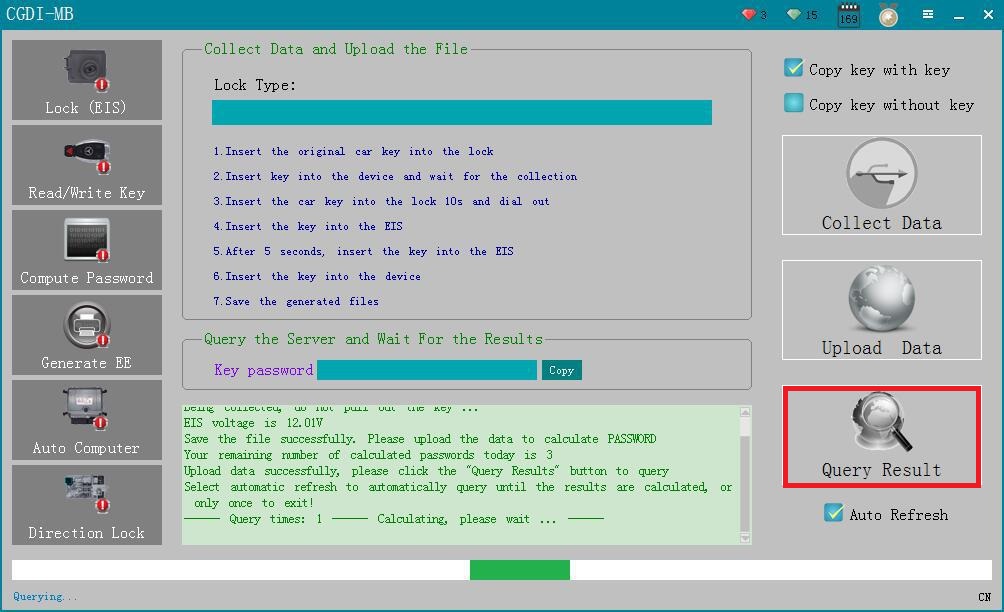
Step 18: Upload data successfully, please click the “Query Results” button to query.

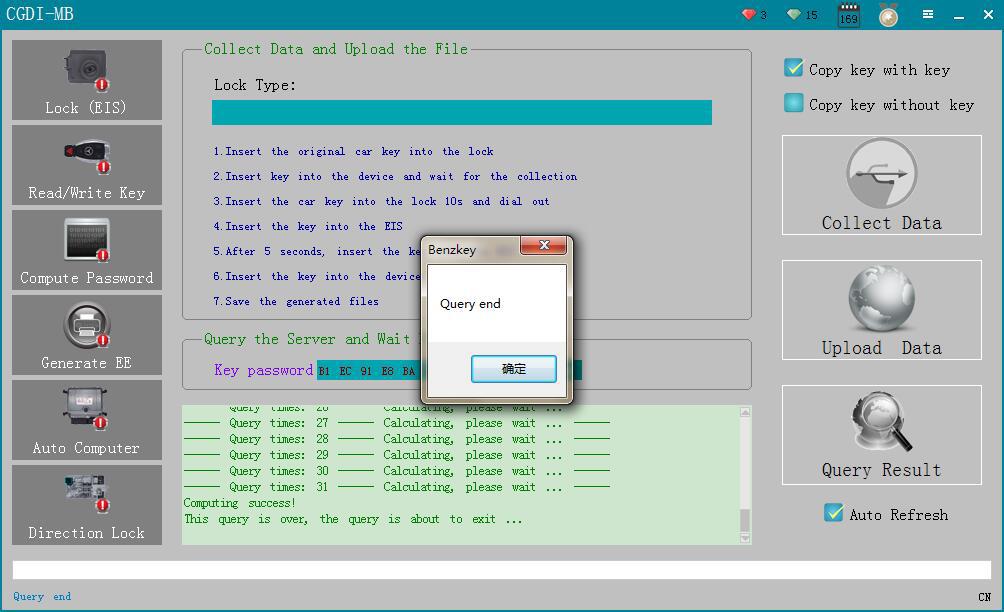
Step 19: Click on “Query result”
Step 20: Display Query time.

Step 21: Query end.
Step 22: click on “Copy” then “Lock (EIS)

Step 23: click on “Paste”.

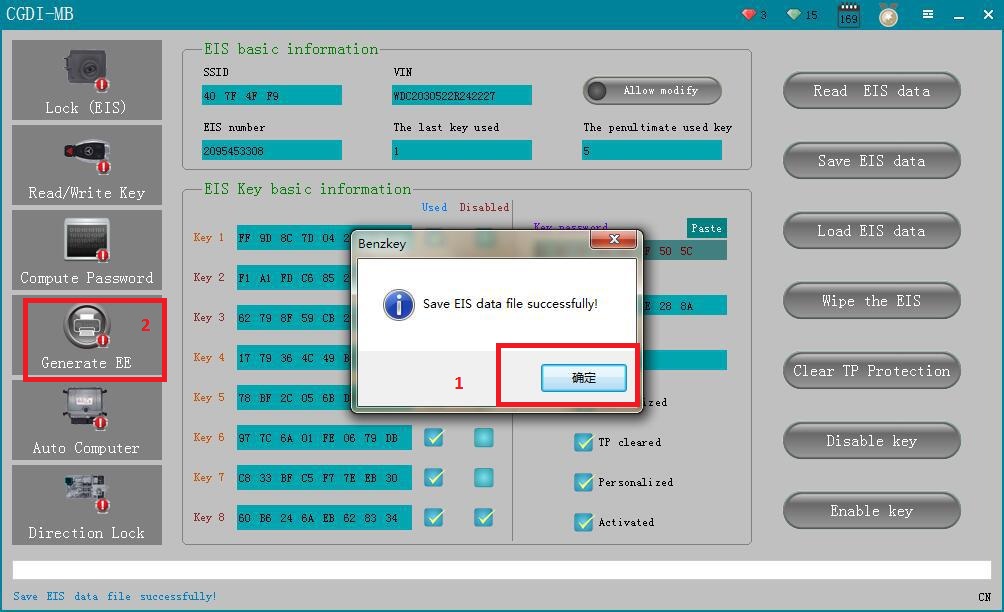
Step 24: Check password if correct or not, then click on “Save EIS data”.

Step 25: click on “Save”.

Step 26: click on “Confirm”, then “Generate EE”
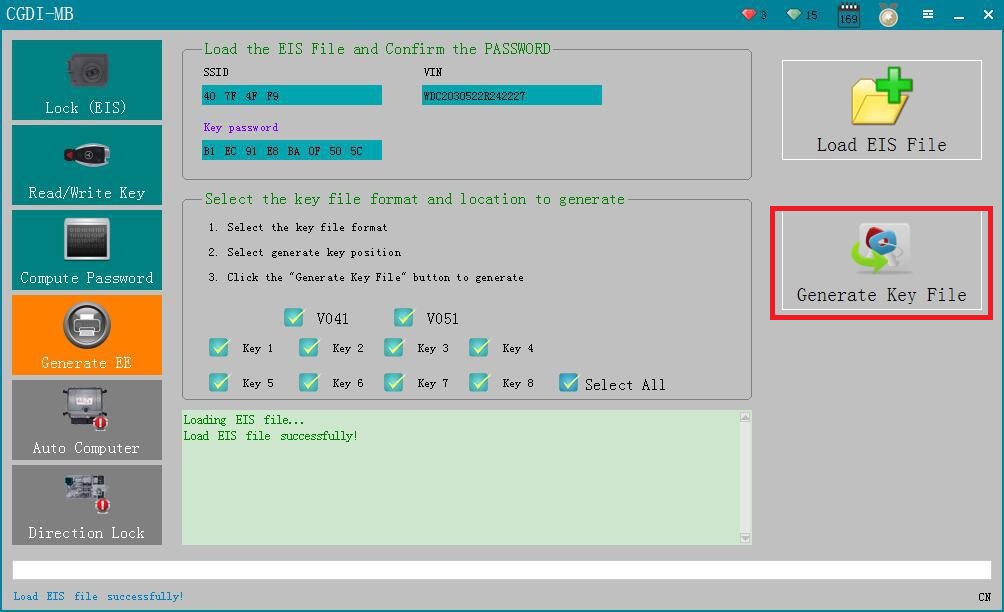
Step 27: Load EIS data.

Step 28: Click on “Open”

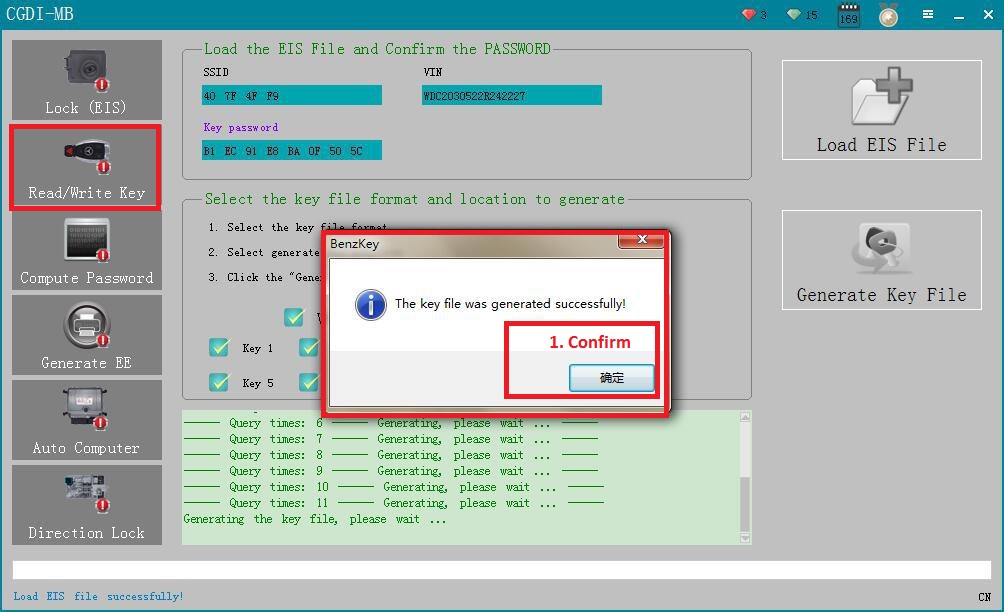
Step 29: generate key file.

Step 30: Click on “Save”

Step 31:Click on “Read/write key”, then “Confirm”.
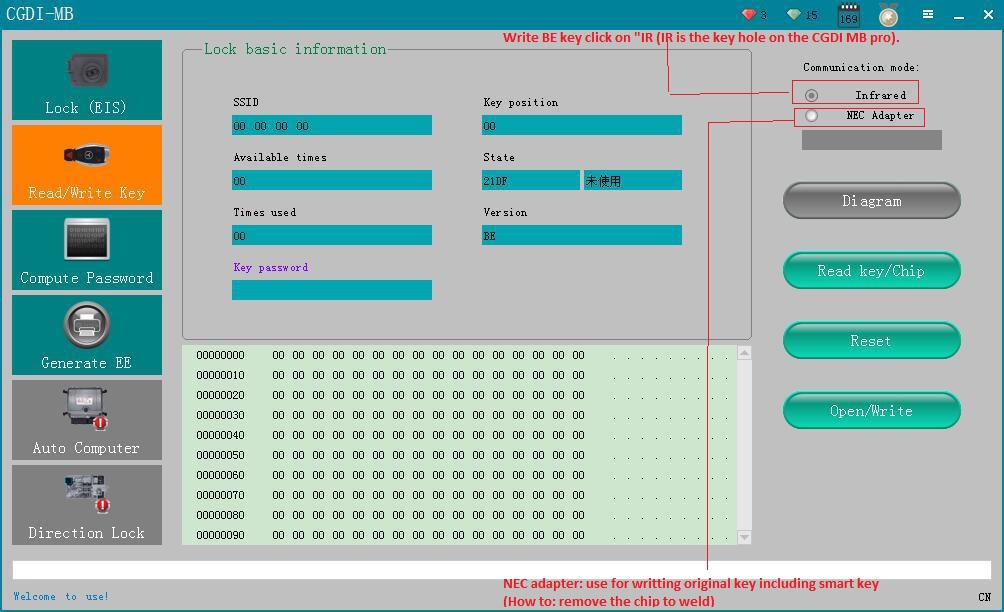
Step 32: Write BE key click on “IR (IR is the key hole on the CGDI MB pro). NEC adapter: use for writting original key including smart key
(How to: remove the chip to weld)
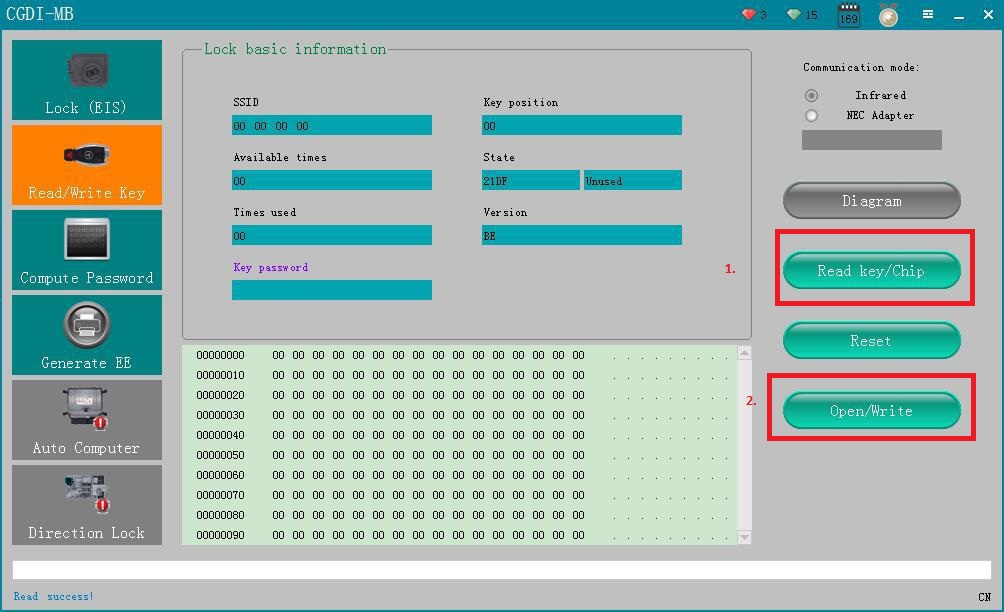
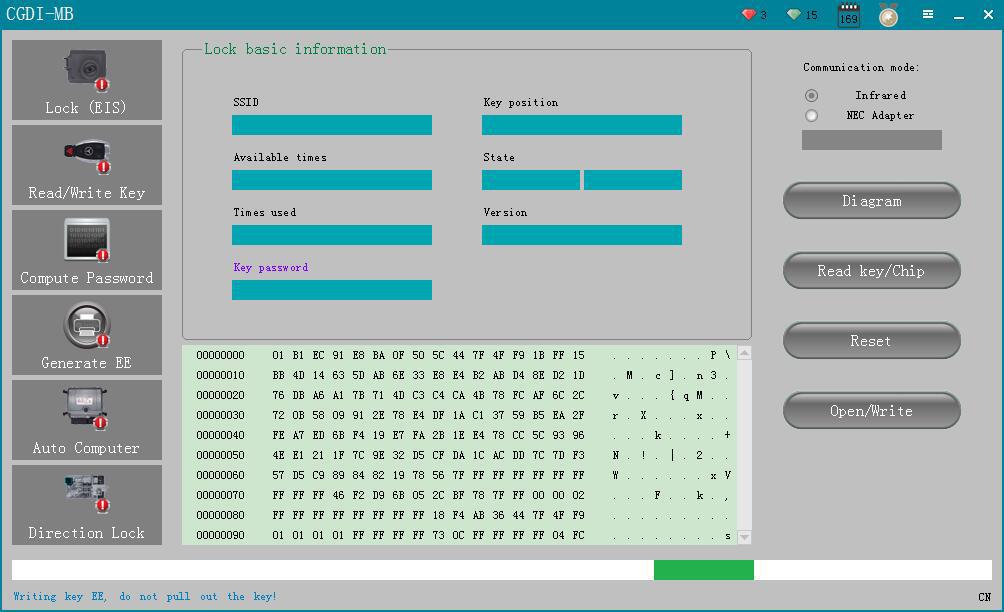
Step 33: Click on “Read key / chip”, then “Open/write”
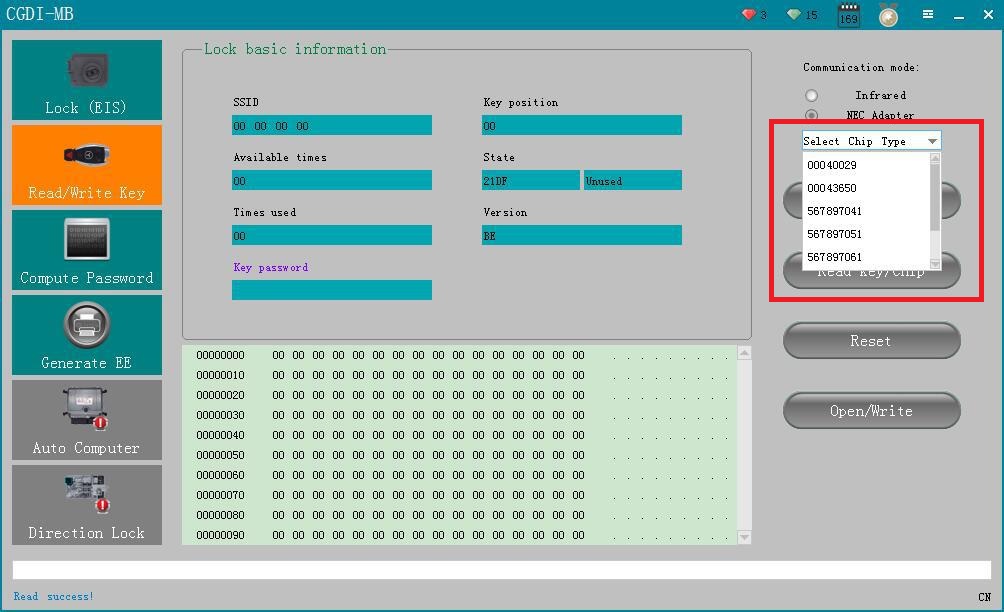
Step 34: Select chip type.
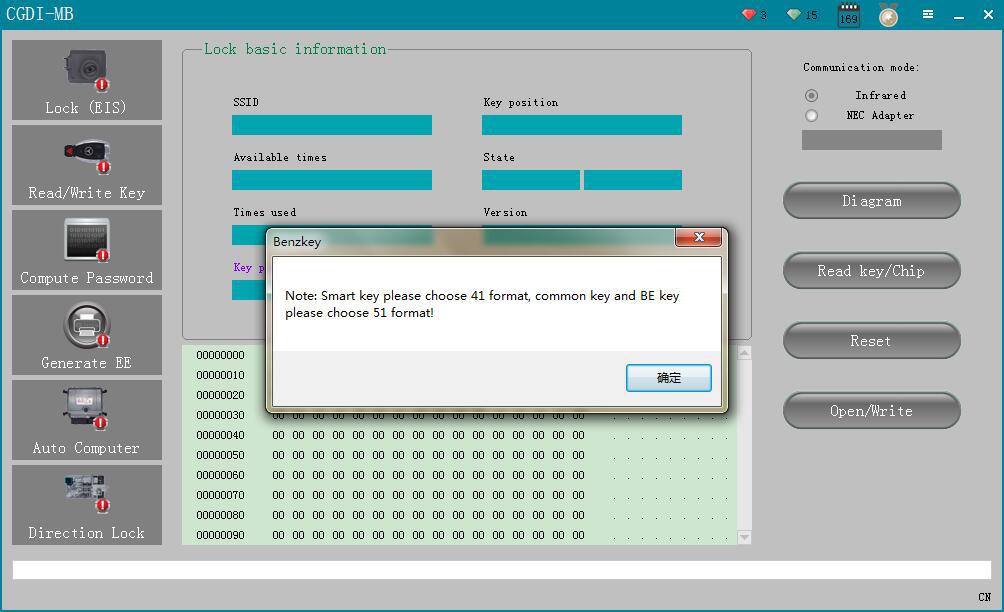
Step 35: Note: Smart key please choose 41 format, common key and BE key please choose 51 format!
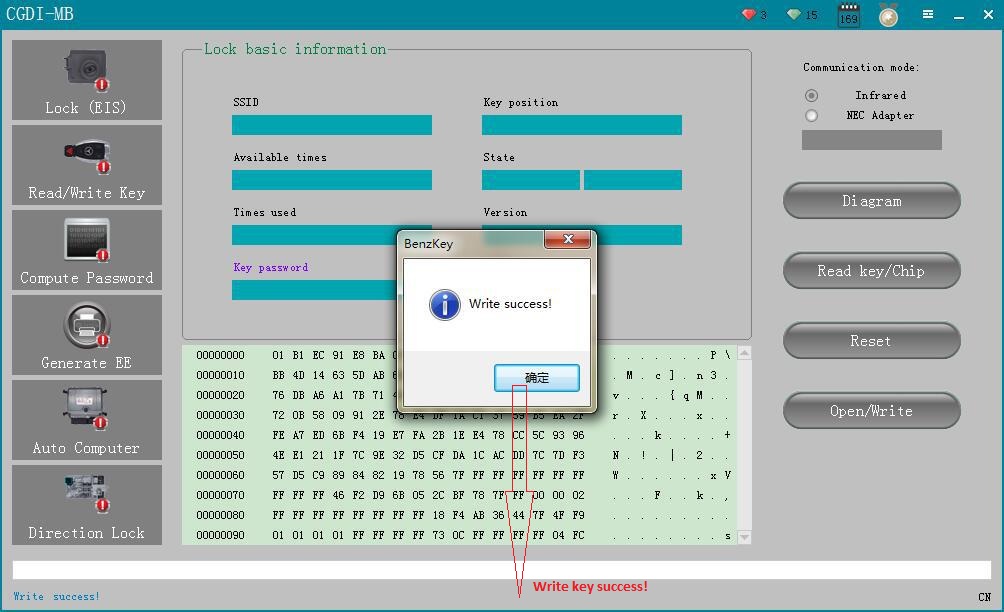
Step 36: Select the location of writting key, then click on “Open”.

Step 37: Write key success!
Step 38: Password display area, write down the password manually.
BE key read password directly, no need to collect data!
